
Merchant Portal
Manage your organization's users
Merchant Portal lets you control who has access to your organization in the merchant portal. From this page you can review users who have requested access, grant or deny their requests, and remove users who should no longer have access.
The User List
You can access the user list from the Company Settings item on the side menu. Once you are on the company settings page, you can click on the User Management tab. The user list is the central view of the User Management page. It displays all users associated with your organization in a table with the following columns:
| Column | Description |
|---|---|
| Full Name | The user's display name |
| The user's email address | |
| Joined on | The date the user was added to the organization |
Users in different states appear together in the list. Action buttons are shown inline for each user depending on their current status.
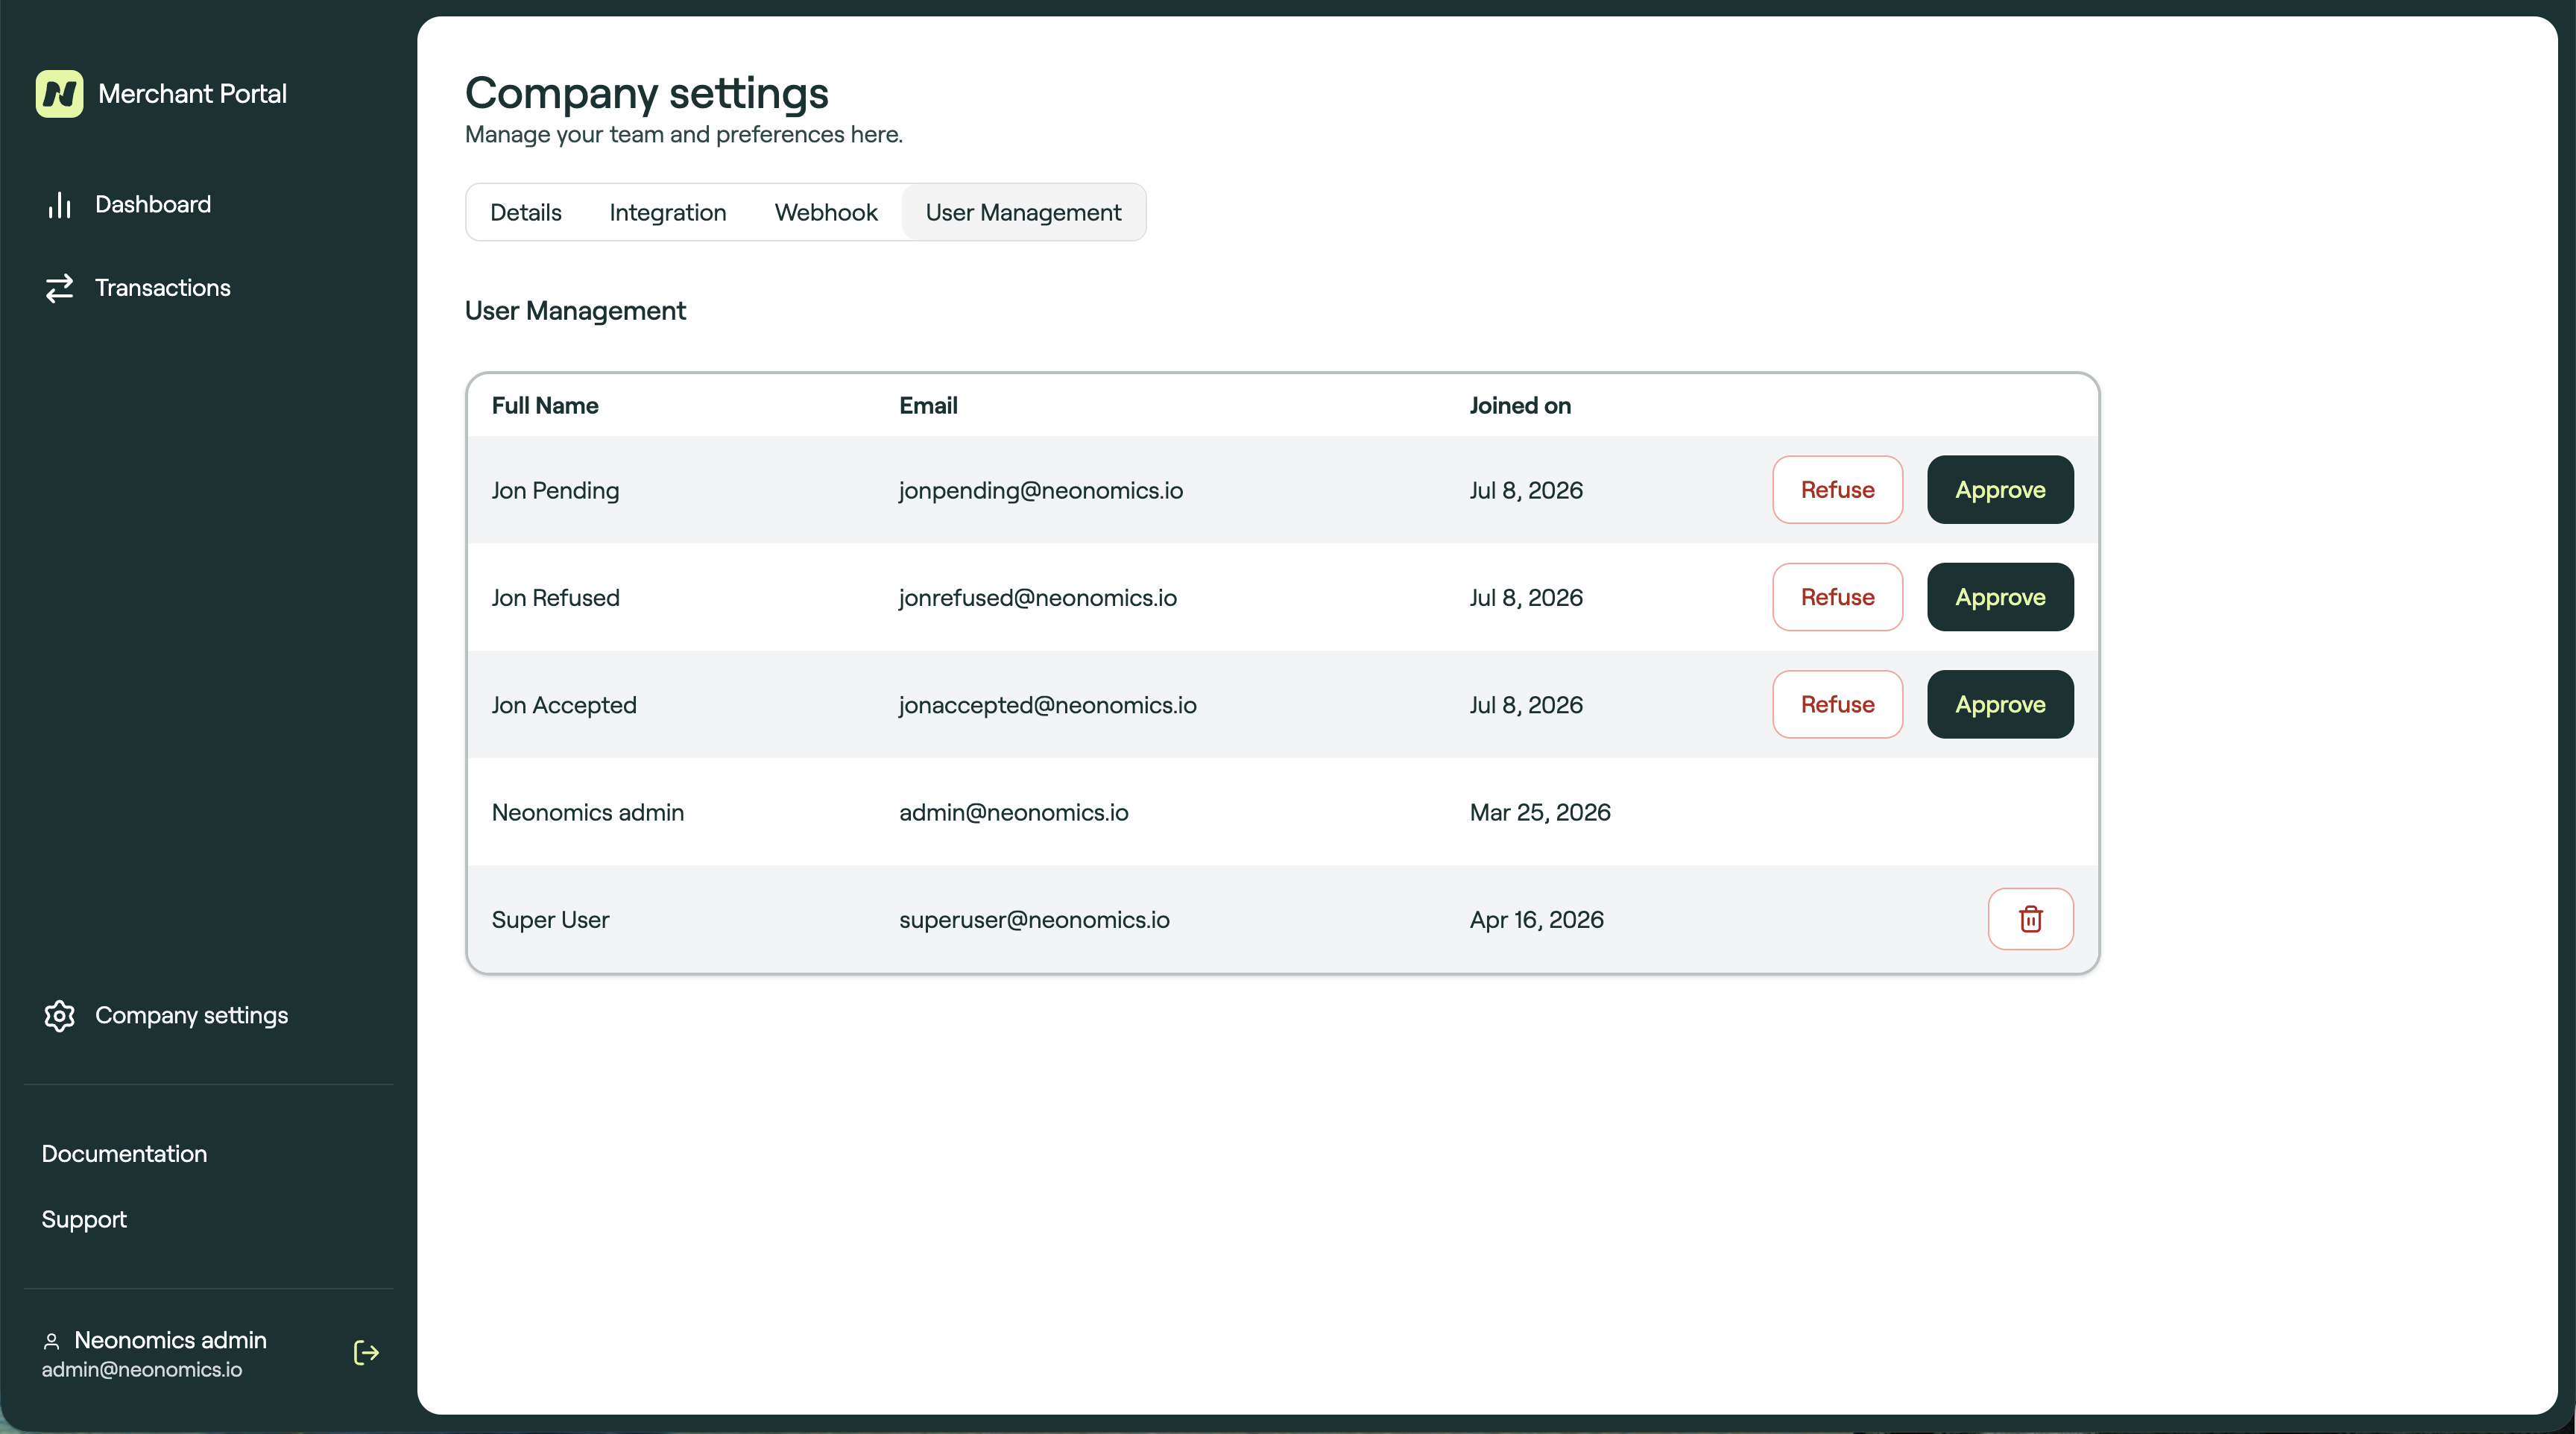
Understanding User Statuses
Each user in the list has a status that determines what actions are available for them.
| Status | What you see |
|---|---|
| Registered | An "Email needs verification" label. No actions are available until the user verifies their email. |
| Verified | Approve and Refuse buttons. The user has completed email verification and is waiting for your decision. |
| Active | A remove (trash) icon. The user has full access to your organization's resources. |
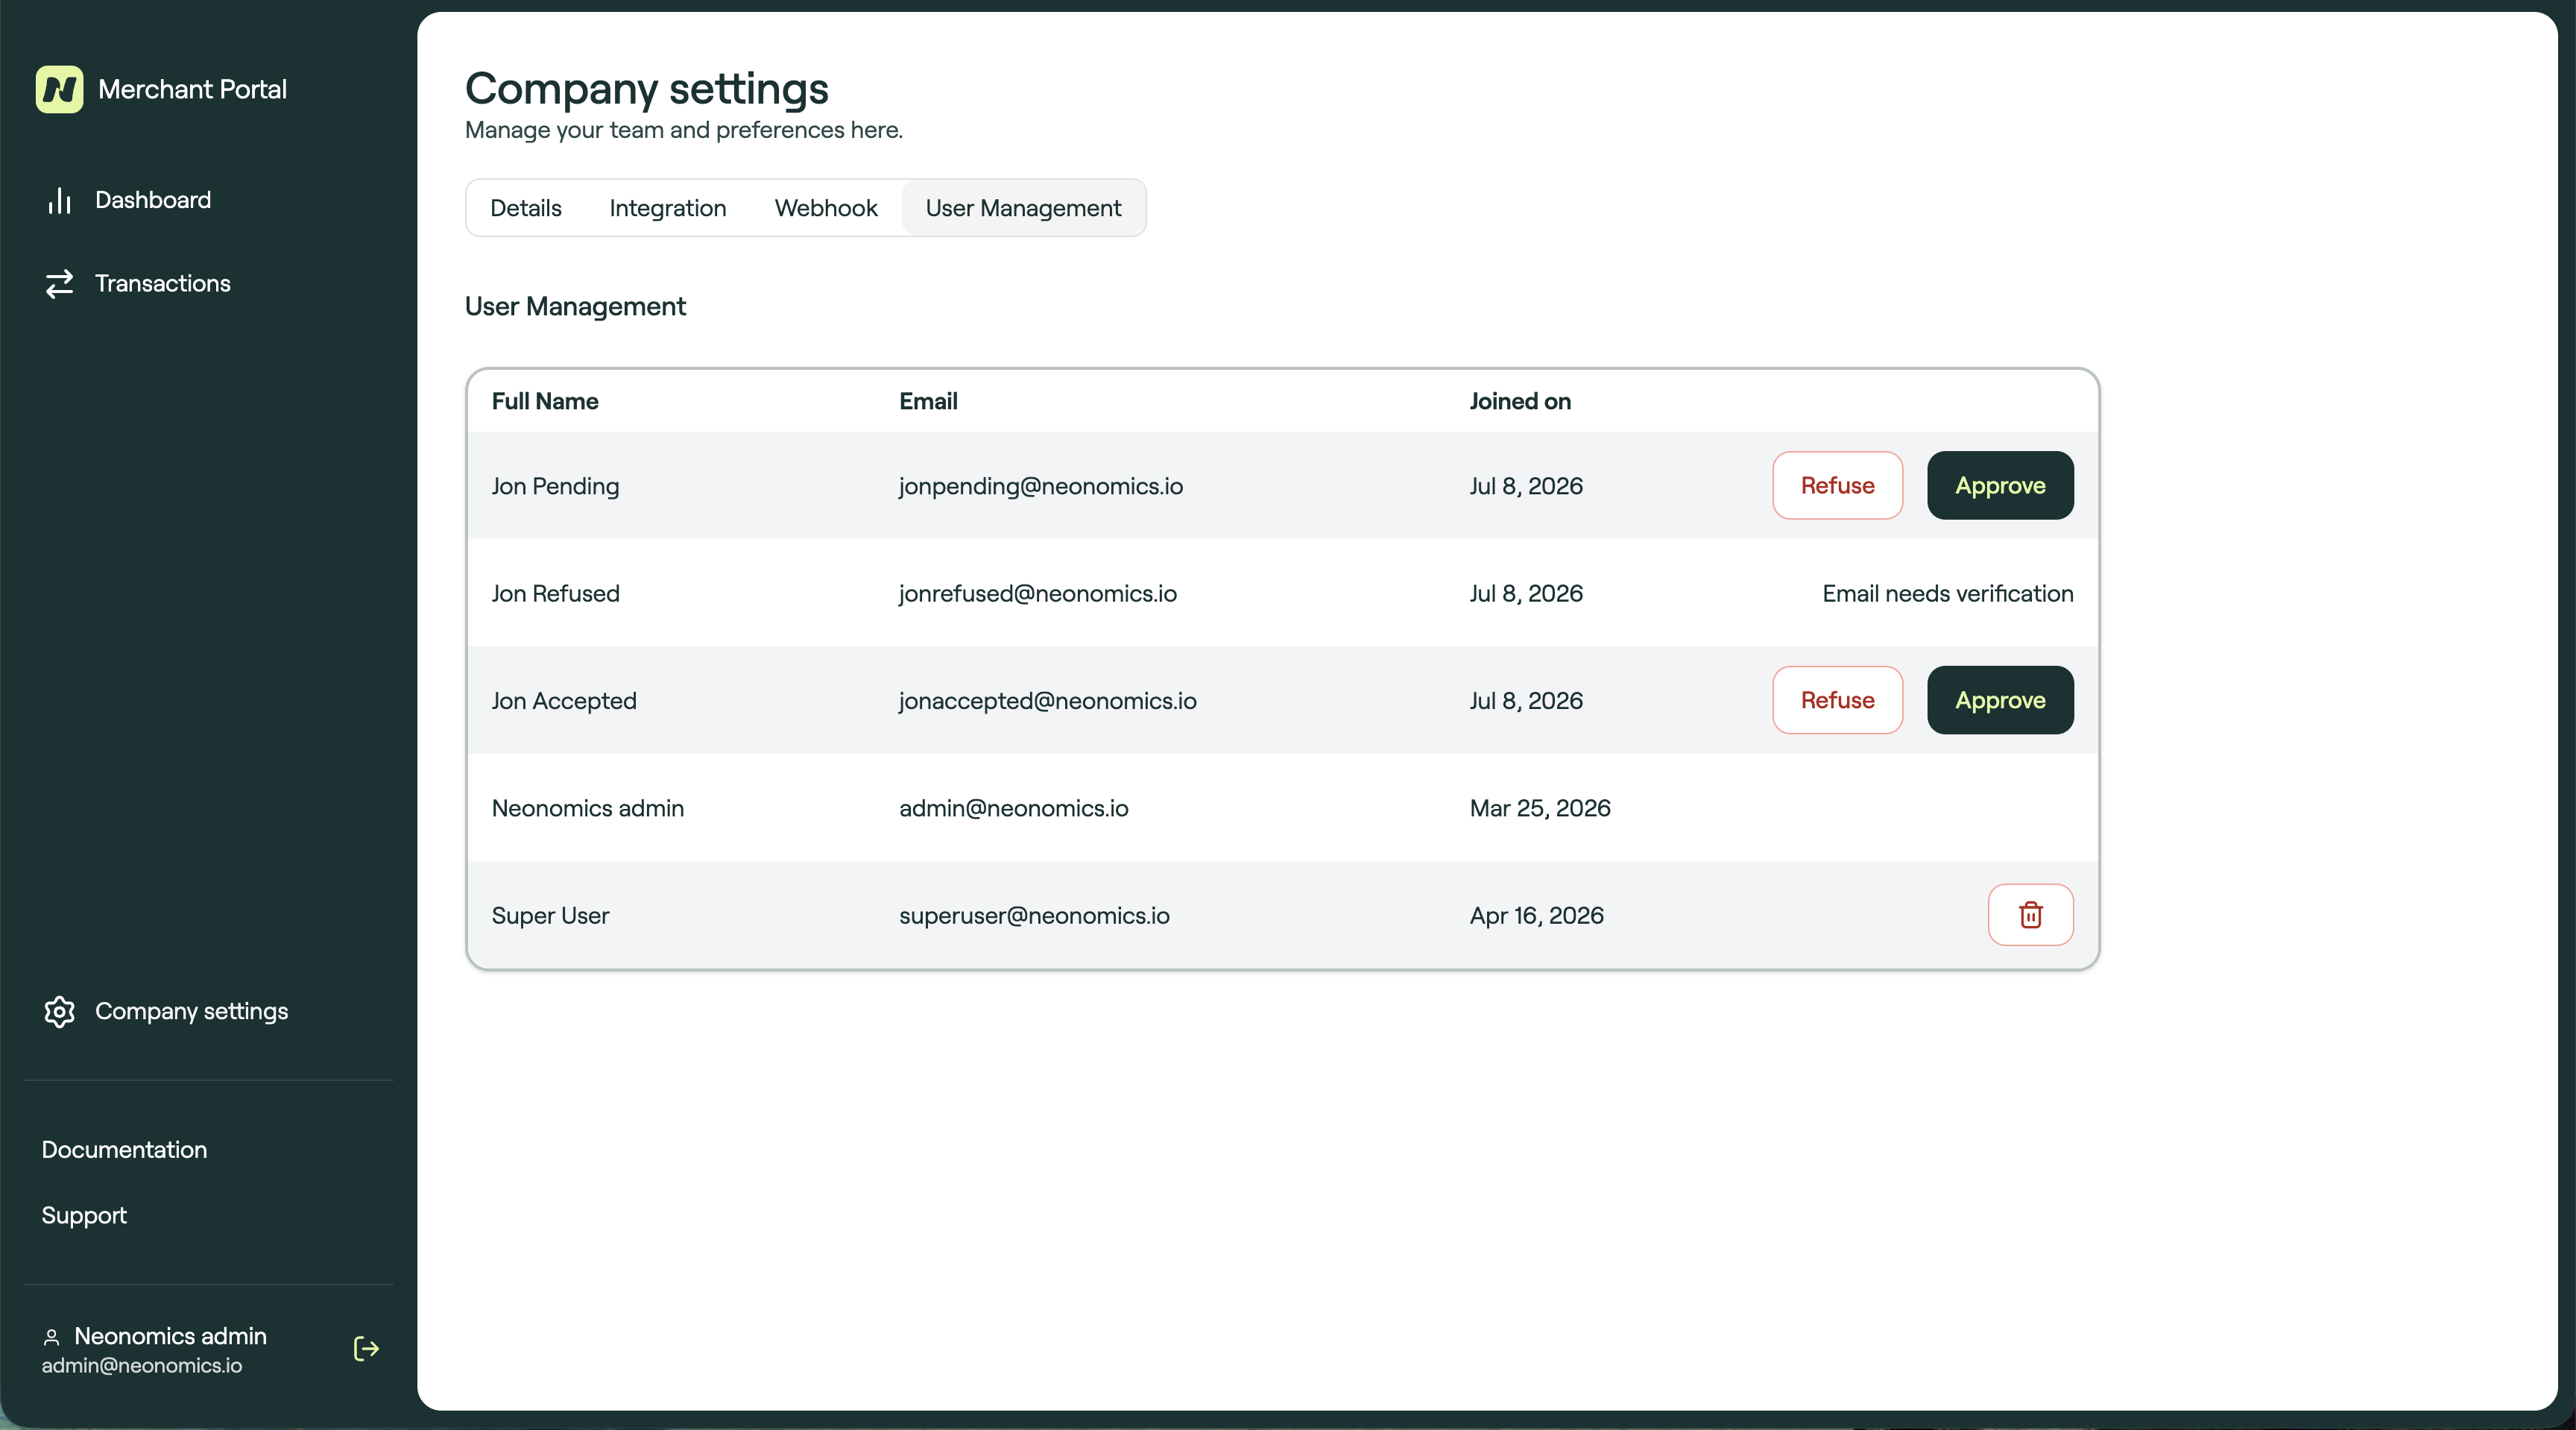
Managing Your Users
Approve a User
When a user has verified their email and is waiting for access, an Approve button appears next to their name. Clicking it grants them access to your organization immediately. Once approved, you will see a confirmation: "[Name] has now access to [Organization]" and the list refreshes automatically.
Refuse a User
If a pending user should not be granted access, click the Refuse button next to their name. This denies the request without removing the user from the system — they may request access again later. Once refused, you will see a confirmation: "You have refused [Name]" and the list refreshes automatically.
Remove a User
To revoke access from an active user, click the remove icon (trash) next to their name. A confirmation dialog will appear before any action is taken:
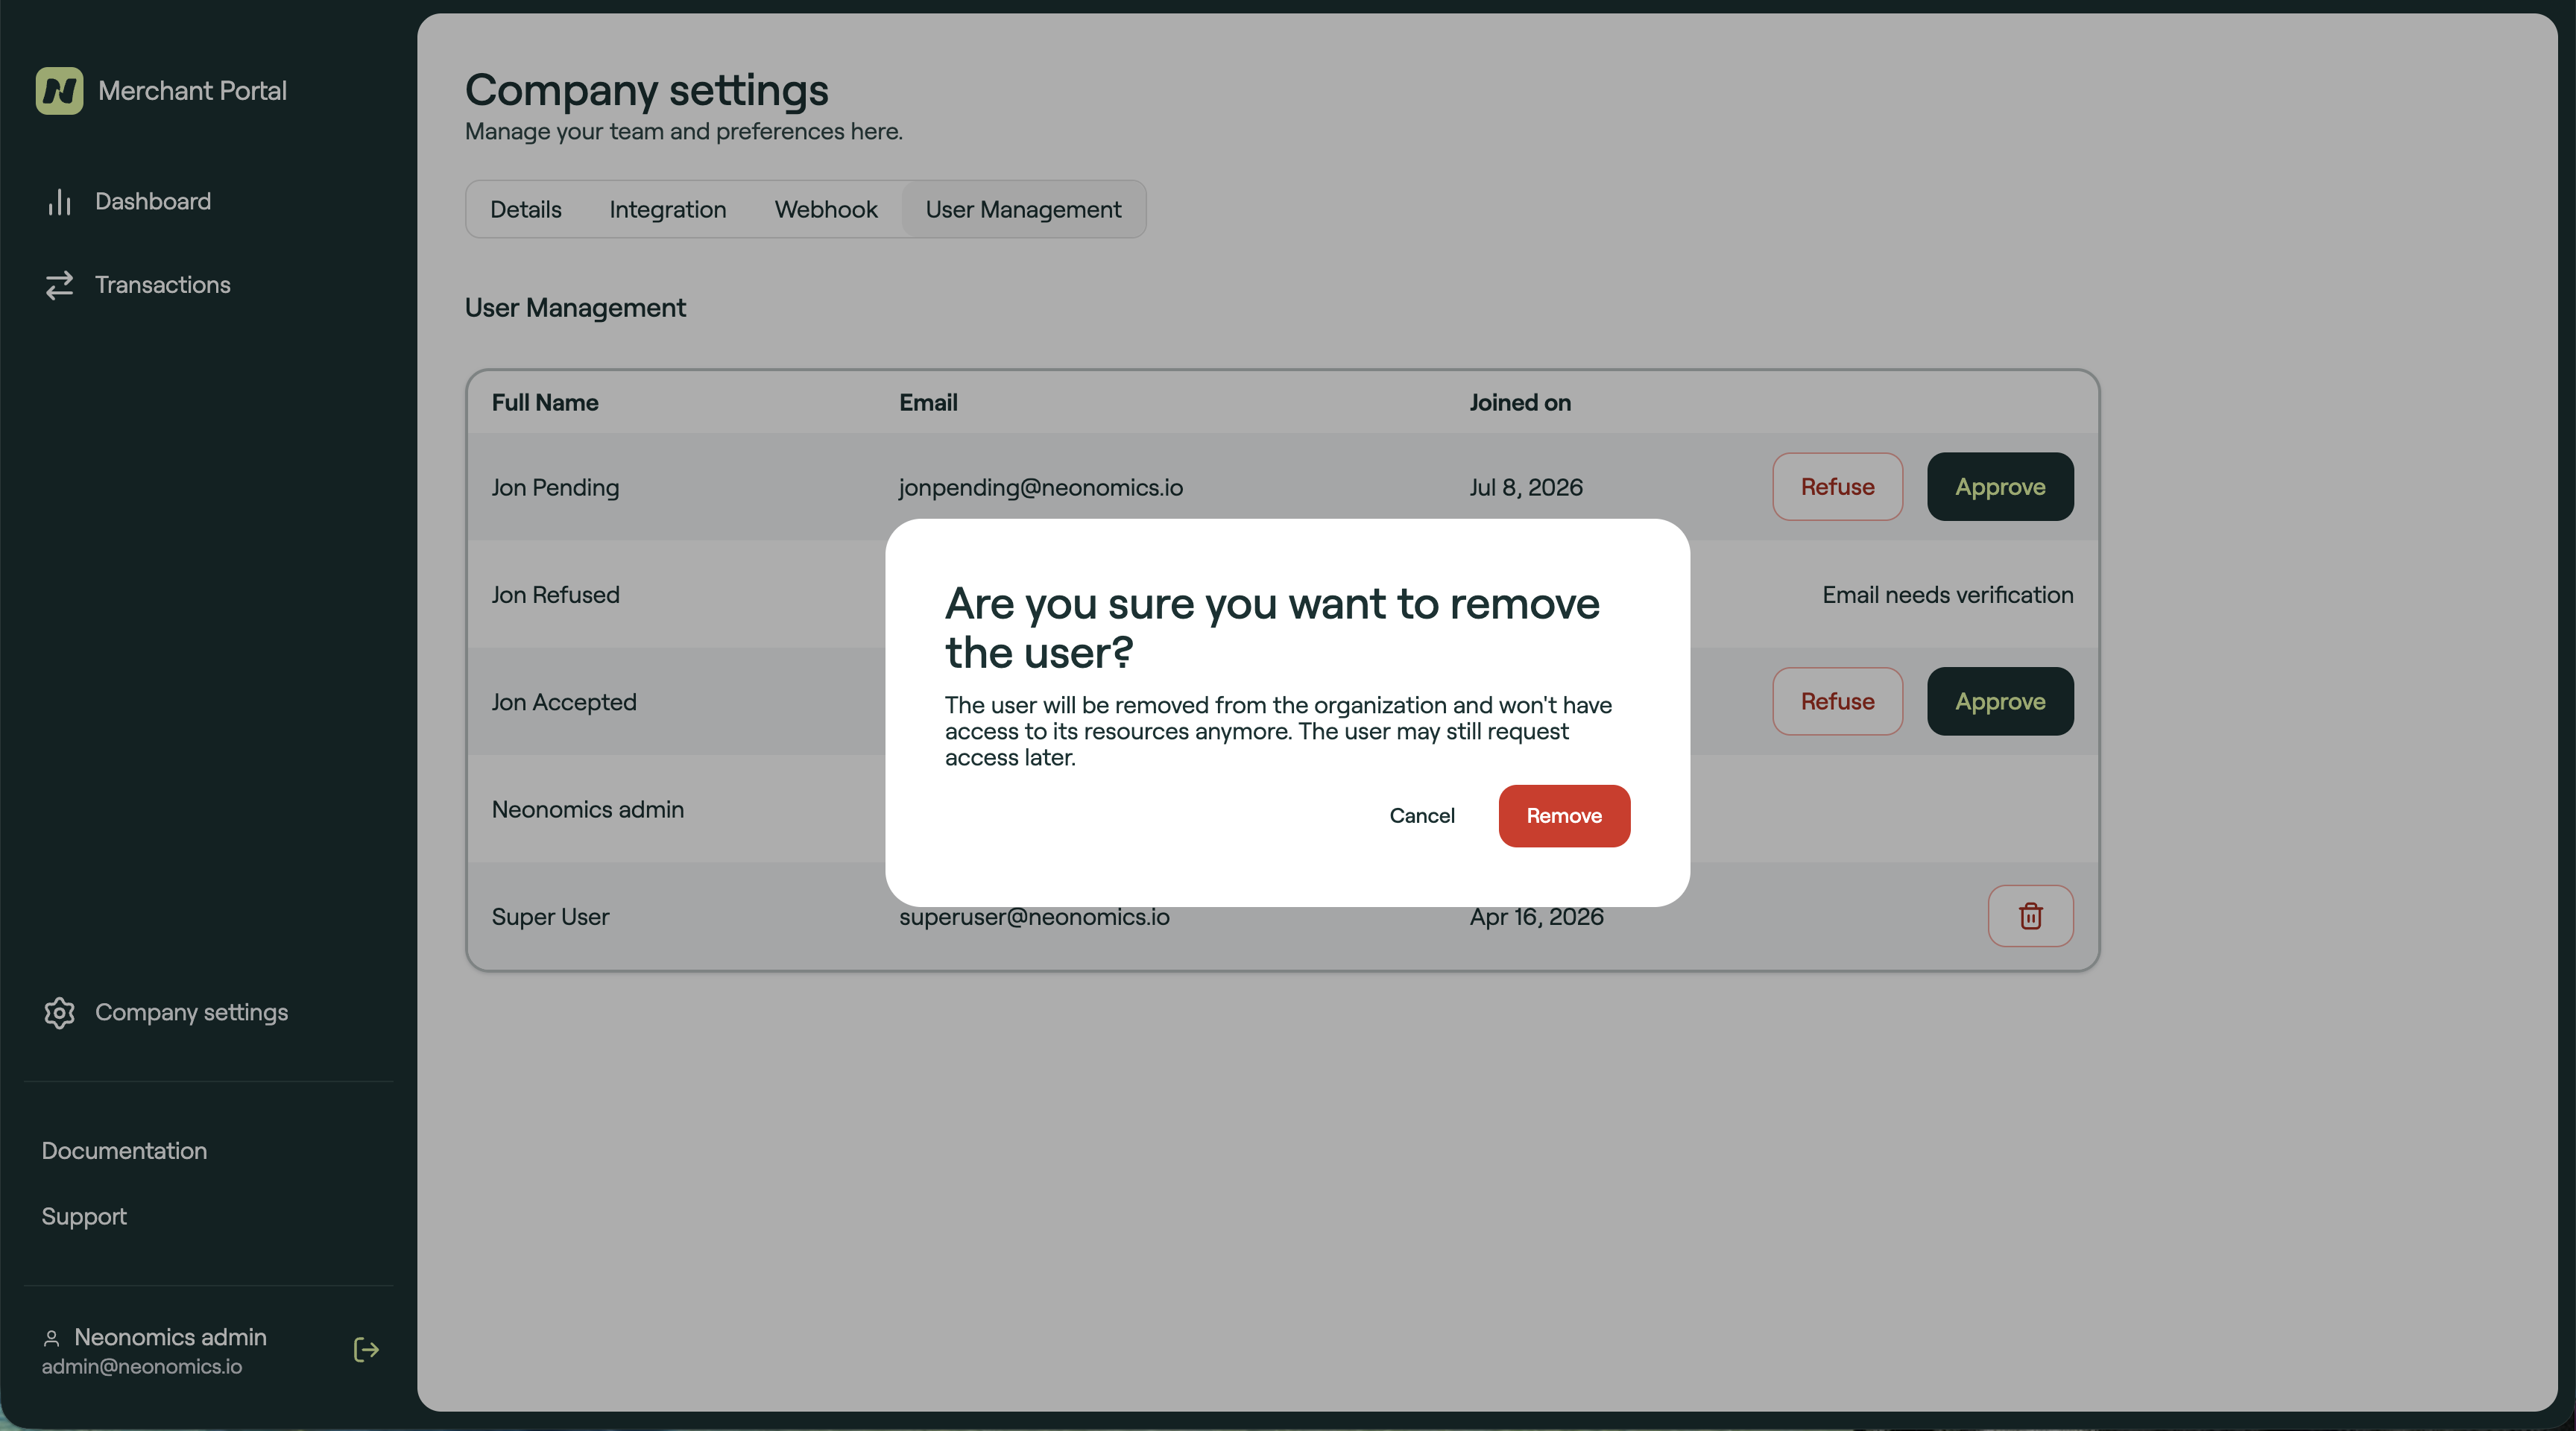
Click Remove to confirm, or Cancel to go back. Once removed, you will see a confirmation: "You have removed [Name]" and the list refreshes automatically.
Note: You cannot remove your own account from this page. If you want to terminate your organization, please contact Neonomics' sales or support team.
Updated 1 day ago